I hate spiders. They’re unnatural. I know they are actually entirely natural, but they shouldn’t be, and they give me the willies. My boyfriend gives me that “you’re bigger than they are, they have more reason to be scared of you have to be scared of them” business, but of course it doesn’t help. To me, every spider might as well be Shelob. I know they’re coming for me. I know they plan to crawl over my face while I sleep, throwing themselves into my mouth in their suicidal desire to make true that outrageous statistic that we all eat 4 spiders a year in our sleep. Don’t kid yourself, they’re coming for you too.
Unfortunately, Halloween is a time when North America embraces spiders as a jolly way to celebrate the season, which just goes to show you how messed up our culture is. People think it’s a great idea to stick big hairy fake spiders to shop windows windows and shove plastic arachnids in your jello. People decorate with these horrid little (or, in cases like this, big) monsters.
Fine. You still better leave my jello the heck alone, but I will grudgingly do a little non food-related creepy crawly decorating. Happily, I have this little crafting handicap where I can never seem to make anything that isn’t cute. I recently experienced a one-time triumph over this handicap to some extent with my Zergling plush, but for the most part even my attempts at “bad guy” or “badass” plushies and so on turn out looking like sweet widdle bundles uv cuddles and joy. It’s sometimes super annoying. But when it comes to spiders, I’ve decided to use it to my advantage.
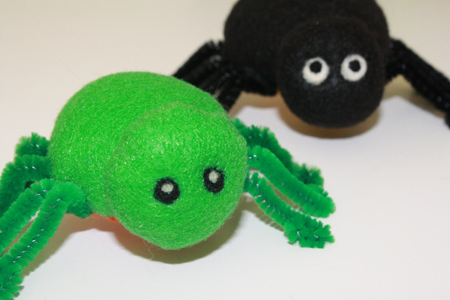
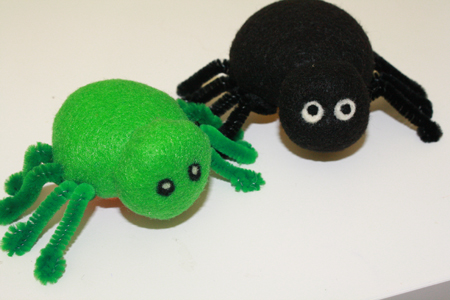
If spiders really and actually looked like these creations, I might be ok with them. More ok, anyway. They still have too many wiggly little legs, but I am able to put one of these guys in my hair and remain calm, at least. Maybe if spider legs were actually pipe cleaners. And never moved on their own. And were attached to inanimate felt bodies.
This is a handy little last minute craft for some Halloween spirit, either to wear or to set around the house.
For another last-minute costume piece, try these simple, quick, low cost cat ear headbands.
————————————————————-
What you’ll need:
materials:
- felt (two colours, and in pretty small amounts)
- two pipe cleaners (preferably coloured to match your main felt)
- thread (to match both colours of felt)
- two beads/buttons/google eyes OR black & white wool rovings
- polyfil or other stuffing
tools:
- sewing needle
- wire cutters OR a pair of cheap, ok-to-be-abused scissors
- fabric scissors
- pen
- three different sized (smallish) circular objects OR this spider circles template
- straight pins
- needle and thread or glue or needle felting tools (foam & felting needles) – depending on what you want to use for the spider’s eyes and how you plan to attach them
- [optional] headband or hair barrette or safety pin or other object to attach the spider to.
————————————————————-
Putting it all together:
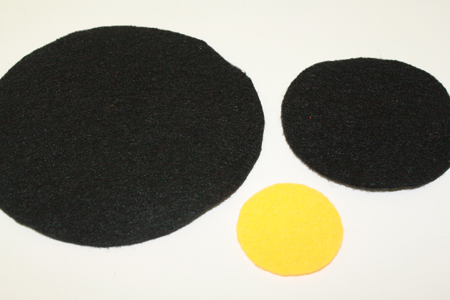
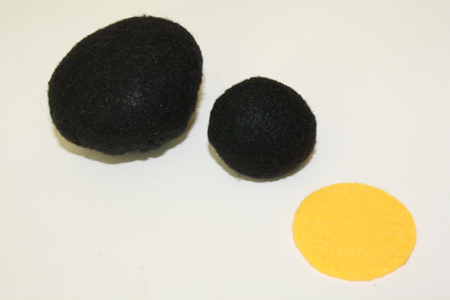
1) Trace and cut out three circles, approximately 4 inches, 3 inches and 1.5 inches across, respectively. Or just print and cut out these spider circles and use them as patterns. The larger two circles should be cut from the colour of felt you want your spider’s body to be. Cut the smallest circle from your second colour of felt, for the spider’s tummy.
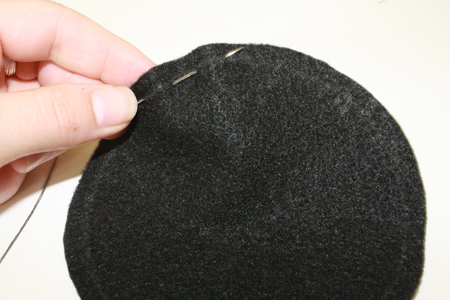
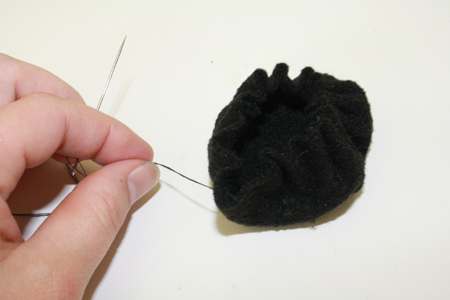
2) Thread your needle, and starting with the largest circle, sew all the way around it (about 1/4″ from the edge) in big loose stitches. Do not knot the thread once you have sewn all the way around, – just let it dangle.
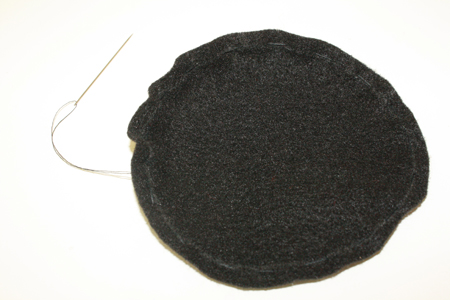
3) Pull on the thread, firmly but without yanking, or you’ll snap the thread. The circle will start to bunch up as the thread pulls its edges together.
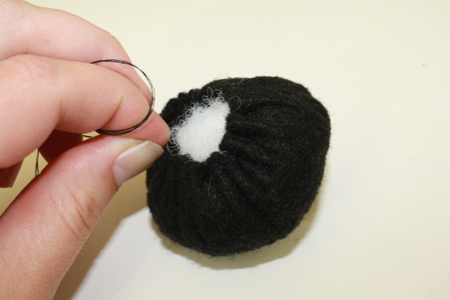
4) Push a wad of stuffing into the circle’s opening. Get as much stuffing as you can in there, then pull the edges of the circle tight, as tight as you can. There will still be an opening and some stuffing showing – that’s fine.
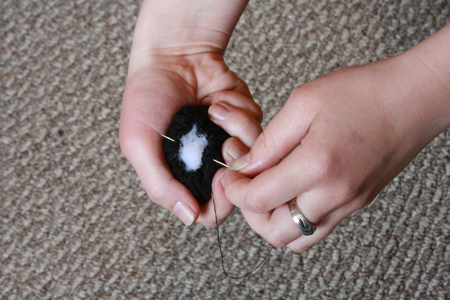
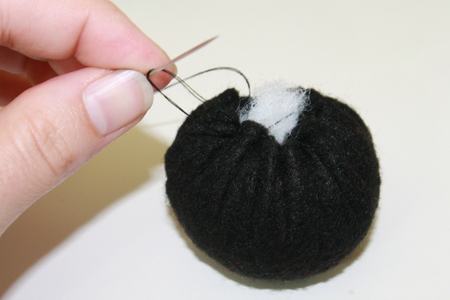
5) Holding the ball tight in one hand so it doesn’t pull open, stitch across the opening a few times, then knot the thread. (To knot the thread, make a stitch but don’t pull it quite all the way through. There should be a loop left. Put the needle through that loop, then pull the thread tight. Repeat another two times, then cut the excess thread.)
6) Repeat this process with the medium sized circle, so that you have two little felt balls of the same colour, one big and one smaller.
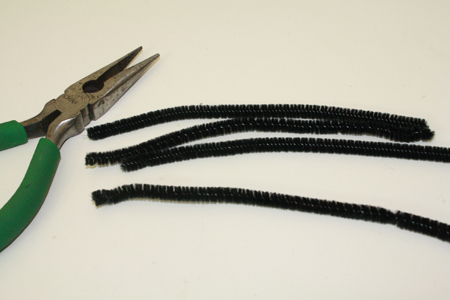
7) Cut two pipe cleaners in half so that you have four evenly sized pieces of pipe cleaner.
8) Curl up the ends of each piece of pipe cleaner, so there are no sharp ends pointing out (and the ends all look like little feet).
9) Thread your needle again. Then take the larger felt ball, turn it upside down and insert the needle into one side of the opening.
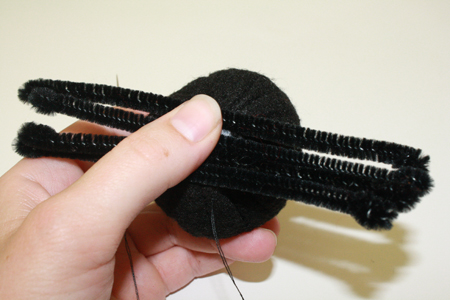
10) Lay the pipe cleaners across the ball’s center, so they run across the opening where the stuffing is visible.
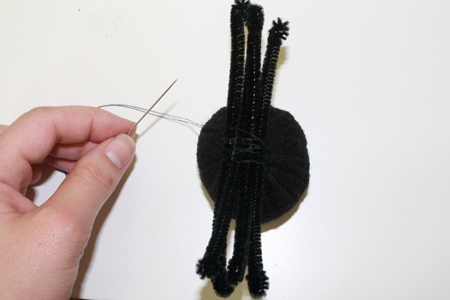
11) Make several stitches over and under the pipe cleaners, back and forth, so they are held firmly in place. Then knot and cut your thread.
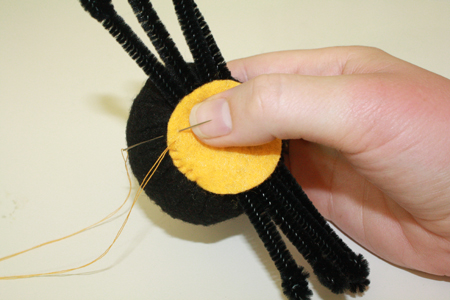
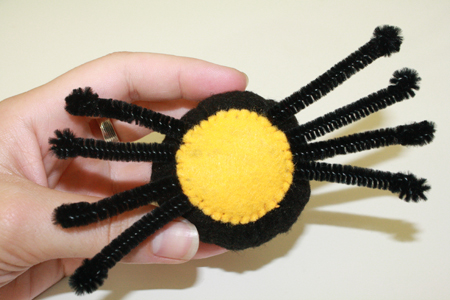
12) Take the smallest felt circle and thread your needle with matching thread. Lay this circle across the underside of the spider, where the pipe cleaners are sewn. Insert the needle into the underside of the small circle, and stitch all the way around the circle with a whip stitch*, catching the material of the felt ball beneath so that the small circle is attached to it. You’ll have to stitch around and between the pipe cleaners where they come out on either side.
*You can see a detailed explanation of how to do a whip stitch in this hand sewn dice bags tutorial.
13) Next, grab the smaller felt ball. If you plan to use beads or buttons or felt circles, etc. for the eyes, you’ll want to stitch those in place now. You can also add needle felted eyes at this point, or do them at the end.
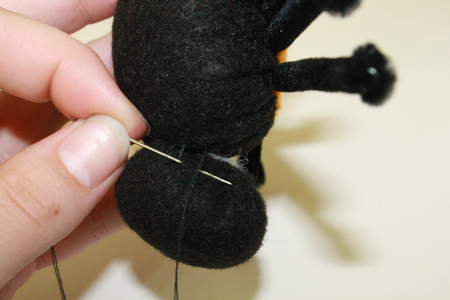
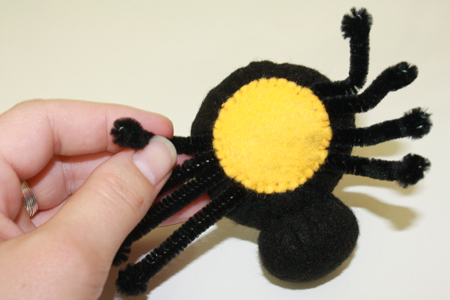
14) Thread your needle. Place the smaller ball (the spider’s head) along one edge of the spider’s body, so that the opening in the back of the head is hidden between the two shapes. Holding it in place, use a ladder stitch to attach it to the body. To do a ladder stitch, you first make a stitch in one ball, then make a stitch right next to it in the other ball, linking the two balls together in that spot. Continue this all the way around, making sure to keep the thread tight.
15) Last of all, bend the spider’s legs into that creepy little inverted V shape they all have.
You can now name your spider and set him or her on your desk in solidarity with Halloween’s misguided notions of appropriate decorating techniques. Or sew the spider onto a hair clip or headband or pin and bear it with you everywhere you go.





Linda
/ October 29, 2011Thanks Tally for sharing:
http://felting.craftgossip.com/2011/10/29/felt-spider-tutorial/
Amara
/ November 1, 2011Made one for my eight year old last night. When she came home three girls in her class wanted one and so did her teacher! My hand is going to hurt! Thanks for the tutorial! So cute!
admin
/ November 1, 2011That’s wonderful, Amara! Well, not wonderful about your poor hurting hands, but wonderful that the kids are loving the project so much. Thanks for sharing that. :)
Linda, thanks so much for the post and the link! I hope your readers enjoy and find it useful.
April
/ October 12, 2012This is so cute! I hate spiders too but I want to make these now!
Discover More
/ June 16, 2014Good post. I learn something new and challenging on sites I stumbleupon everyday.
It will always be interesting to read through content from other
authors and practice a little something from their sites.
this review
/ June 16, 2014It’s difficult to find well-informed people on this subject, however,
you seem like you know what you’re talking about!
Thanks
more information
/ July 8, 2014It is appropriate time to make some plans for the future and it’s time to be happy. I have read this post and if I could I desire to suggest you few interesting things or tips. Perhaps you can write next articles referring to this article. I wish to read more things about it!
lam bang dai hoc
/ September 23, 2014This is the perfect website for anybody who really wants to find out about this topic.
You understand so much its almost tough to argue with you (not that I personally will
need to…HaHa). You certainly put a fresh spin on a topic that
has been written about for years. Great stuff, just wonderful!
Look at my web site :: lam bang dai hoc