
Protected: paper gift packets
http://tallystreasury.com/2015/02/paper-gift-packets/
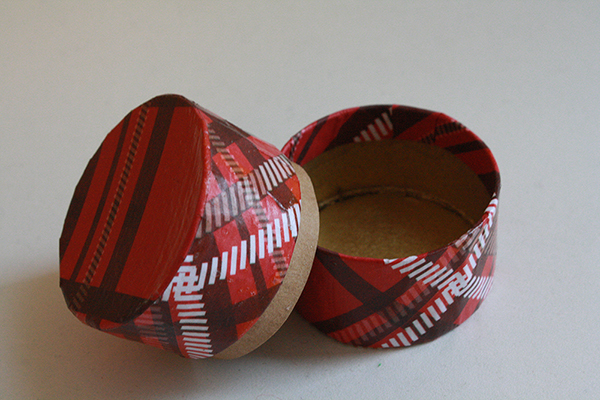
round gift boxes
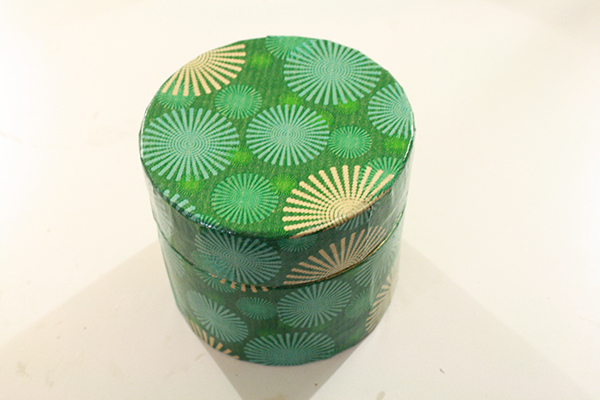
I’ve started rubbing my hands happily at work anytime we use up another roll of packing tape, because it means I have a new craft supply. I positively pounce on the empty cardboard tabe tubes before they can hit the recycling bin. They come home with me and are turned into darling little paper-covered boxes. They’re wonderful for gift giving, storing jewelry or other small items, hiding those little spring-loaded peanut-can pop-out snake things in… (Anyone else remember those from childhood? What the heck do you call them?)
This project has been tried and tested and proven to be a wonderful any-season bit of crafting. By which I mean, I started the tutorial in December, because gift boxes are handy right around Christmastime, but I’m only getting it posted now, but guess what, these boxes are just the right size for some fancy Valentine’s chocolates, or a plethora of those horrible chalky candy hearts! (Stay tuned for more on that topic next tutorial…) Later on there’s Easter chocolate, and birthdays and anniversaries get scattered throughout the year, so I say just make a couple boxes and tuck them away for whenever they’re next needed.
http://tallystreasury.com/2015/01/round-gift-boxes/
paper snowflakes – make an indoor winter wonderland

Christmas is my very very favourite holiday, and one of my very very favourite things about this holiday is decorating. The lights and decorations (within tasteful reason) are a large part of what creates the magic of the season for me.
Last year, @thatlaurachick asked me if I had any advice for hanging paper snowflakes, because that’s how she wanted to decorate her home. I didn’t, because I’d never really tried it before, only stuck them on windows. It had been years since I’d even made paper snowflakes. But you know me, always up to try a new thing. I was nannying at the time, so I spent several days at work making paper snowflake after paper snowflake, teaching the 2 1/2 year old the basics of the craft so she could make her own little toddler versions alongside me. (She did remarkably well at it, actually, and a few months later when she went off to pre-school and I got a new job, I heard that her teacher couldn’t believe how good she was at handling scissors and admired her fine motor control. Heck yeah! Lasting influence! I kept telling her parents that stuff was useful! And boy did cutting apart bits of paper keep her occupied for long stretches of time…)
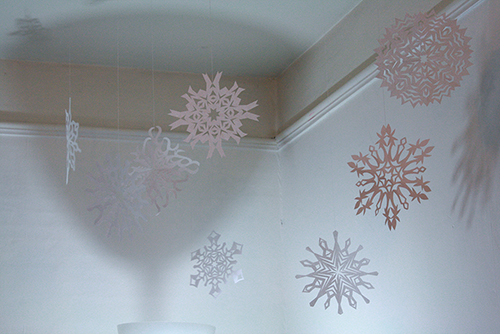
Anyway, I put a blizzard of snowflakes up in our apartment, which looked gorgeous. This year we’re in a different apartment, one with high ceilings and crown moulding and lots of character (meaning it’s pretty + a bit rundown + our heating bill is outrageous + there’s an actual backyard with an apple tree… pros and cons), so I bought a stepladder and lengthened the threads on last year’s snowflakes (to deal with those higher ceilings) and hung them back up, plus some new ones I’ve made this year. And voila, we have a winter wonderland indoors again. Which, for those of you living in places with actual proper winter, is lovely because we totally don’t have that outside.
It’s some of the cheapest, simplest and – I think – most gorgeous Christmas decorating you can do. There are two “tricks” to decorating with paper snowflakes. First, how to cut them out and make them actually look pretty and lacey and nice (my first few last year were pretty awful, really and truly). And second, how to get them really nice and flat so they’ll hang flat and not all folded like they get from their creation process. Keep reading, and I’ll tell you how to accomplish both these things.
http://tallystreasury.com/2014/12/paper-snowflakes-make-an-indoor-winter-wonderland/
“Craft Shop” – a rap parody
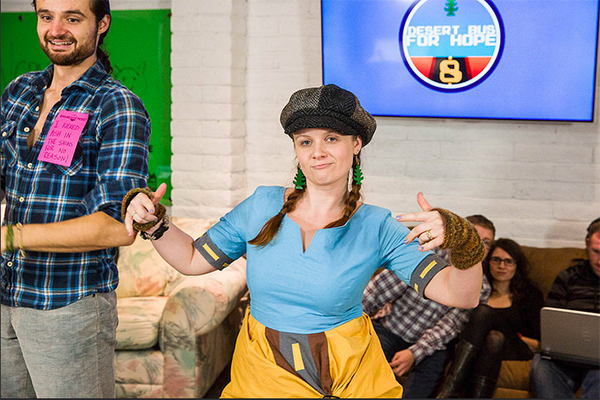
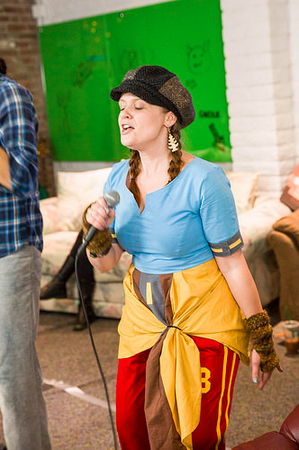
The following is a parody of Macklemore’s song “Thrift Shop.” I wrote the parody version for kicks a few weeks back, and then performed it at Desert Bus for Hope 8 (a massive annual online charity event I help organize and run). You can watch that performance here. Good grief I was so nervous – rap music is not something I’m experienced at performing.
Photos from the performance below, all taken by Andrew Ferguson. You can see more of his work here, and more of his Desert Bus photos specifically here.
Craft Shop
I’m gonna make some stuff,
Only got scissors and a bit of hot glue
I’m crafting, looking for a project
This is fucking awesome.
Walk up to the fair like “What up? I got a hit blog!”
I’m so pumped about some shit from the craft shop
Stencil on my shirt, it’s so damn whimsical
That people like “Damn! That’s some crazy DIY skills!”
Rollin’ in, hella deep, headed to the mezzanine
Dressed in all rustic, ‘cept my ankle boots, they’re shabby chic
Draped in a cotton shrug, hipsters standin’ next to me
Prob’ly shoulda hemmed this, looks like junior high home ec
But shit, it took fifteen minutes!
Cuttin’ it, pastin’ it, ‘bout to go and get some compliments
Passin’ up that pine cone craft someone else was Pinteresting
Clever and unique, suck it man
I am sewing and knitting and
Rackin’ up air miles and I’m hella happy that’s a bargain bitch
I’ma take your grandma’s style, I’ma take your grandma’s style,
No for real – ask your grandma – can I have her fabric scraps?
A light paisley and some old quilt blocks
Shiny gold sequinned lace that I found digging’
They had a Cricut Mini, I bought a Cricut Mini
I bought embossing powder, then I bought some gold leaf
Hello, hello, my ace gal my Martha
Etsy ain’t got nothin’ on my handmade game, hell no
I could take some fancy paper, cut out flowers, paste those,
The scrapbookers would be like “Aw, she should’ve stencilled.”
I’m gonna make some stuff,
Only got scissors and a bit of hot glue
I’m crafting, looking for a project
This is fucking awesome.
I’m gonna make some stuff,
Only got scissors and a bit of hot glue
I’m crafting, looking for a project
This is fucking awesome.
What you know about stampin’ a bag with some chevrons?
What you know about getting a pattern drawn?
I’m makin’, I’m makin’, I’m getting that inspiration
One gal’s fail, that’s another gal’s stage one
Thank your grandma for making that old granny square quilt
‘Cause right now I’m learnin’ those skills
I’m at the craft store, you can find me in a Michael’s
I’m that, I’m that crafter searchin’ through the ribbon bin
Your grammy, your aunty, your momma, your mammy
I’ll take that cardboard chandelier kit discount price, I’ll make that motherfucker
The melted crayon art I made that motherfucker
I hit the craft fair and they stop in that motherfucker
They be like “Oh, that Gucci, that’s hella tight.”
I’m like “Yo, that dress doesn’t even have pockets.”
Underwhelming composition, let’s do some simple revision,
Dress without pockets – that’s just quick pattern fix
I call that getting swindled and pimped
I call that getting tricked by a business
That dress is hella dough
And having nowhere to put your stuff while you’re out is a hella don’t
Pinterest, come and take a look through my favourite posts
Try to step to my amount of pins? Well you hella won’t
No you hella won’t
I’m gonna make some stuff,
Only got scissors and a bit of hot glue
I’m crafting, looking for a project
This is fucking awesome.
I make your grandma’s crafts
I’m kicking so much ass
Check my supply-filled tote
From that craft store down the road
I make your grandma’s crafts
I’m kicking so much ass
Check my supply-filled tote
From that craft store down the road
I’m gonna make some stuff,
Only got scissors and a bit of hot glue
I’m crafting, looking for a project
This is fucking awesome.
Is that your grandpa’s quilt?
-parody lyrics by Tally Heilke, 2014
http://tallystreasury.com/2014/11/craft-shop-a-rap-parody/
D&D for Extra Life – 8 hours of dice & dragons &
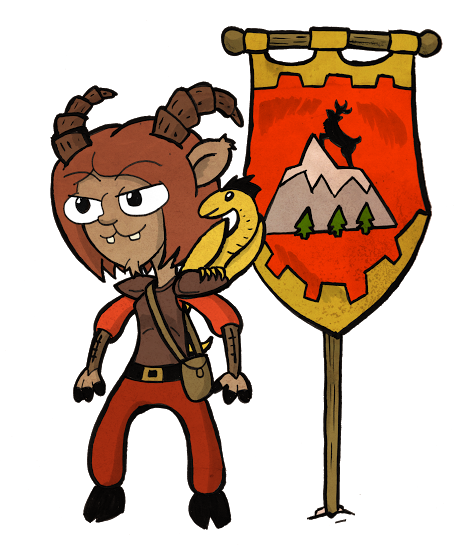
Thanks to @Featherweight_ for the awesome artwork of my character shown above. And to @Lord_Hosk for making the request for this drawing.
Hey everyone! So bright and early tomorrow (Saturday, October 26), I’ll be playing Dungeons & Dragons with the Wizards of the Coast D&D team, all to raise money for children’s hospitals. The game (and our indefatigable dungeon master) will be going for 25 hours (daylight savings, woo!). I’ll be playing for the first 8 hours of that, starting at 8am PST.
You can watch the livestream of our game right-here-click-here.
You can donate to my efforts throughout the day, or to other members of my team.
—– MORE PRIZES —– Read the full post »
http://tallystreasury.com/2014/10/dd-for-extra-life-8-hours-of-dice-dragons/
penguin onesie
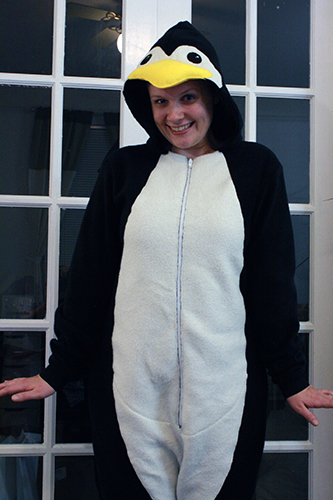
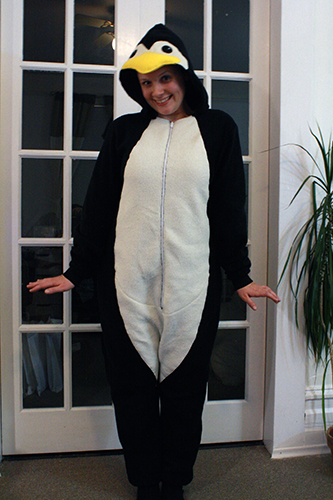
Remember that time I was on Feed Dump, and we discussed a news story about a guy who stole beer while dressed in a penguin onsie, and I was all: Wait where do I get a penguin onsie?! Well you can buy them all kinds of places, and lots of people sent me links with that wonderful information. But as usual, I decided to take things into my own hands.
Let me tell you, there is pretty much nothing more soft and comfortable and so so warm than a full-body wrap made out of fleece. I never want to take mine off. And with Halloween right around the corner, I cannot recommend this enough as a costume idea. While my instructions are for a penguin suit, with some simple modifications you could create all kinds of animals, from penguins and parrots to dragons, badgers, foxes, etc. And what does the fox say? It says forget those lingerie-with-ears outfits and put on some fur – it’s COLD outside in October! Here, wear this fleece onsie, you will be so very happy you did.
Happy Halloween!
http://tallystreasury.com/2014/10/penguin-onesie/
Extra Life D&D – tales of a mighty goat warrior & her dragon
Ok, well, her pseudodragon, anyway.
So here’s the deal: I’m playing Dungeons and Dragons on October 25th as part of the Wizards of the Coast D&D Extra Life team. Extra Life is a wonderful DIY sort of fundraising project – it gives anyone and everyone the tools to put together a 25* hour gaming marathon to raise money for The Children’s Miracle Network. It’s an awesome cause, with participants around the world raising millions of dollars to help kids.
To do all this, we’re playing a D&D game with one DM, Greg Bilsland, and a rotation of players. Those of us playing are offering various incentives to encourage donations, from determining what characters we play to winning prizes. The team will also be giving out prizes on the day of the event, and you can tune in for a chance at those and to watch us play, at twitch.tv/dnd, starting at 8am on October 25.
I’ll be playing from 8am – 4pm. Below, thanks to many generous donors, are details of just what my character looks like so far.
http://tallystreasury.com/2014/10/extra-life-dd-tales-of-a-mighty-goat-warrior-her-dragon/